Bringing VR Experiences into the Language Classroom with Mozilla Hubs
By Rachel Mamiya Hernandez, University of Hawai‘i at Mānoa

DOI: https://www.doi.org/10.69732/OILM3809
Introduction
Perhaps one particularly challenging aspect of teaching over the past year and a half has been how to break the monotony of online classes. Video Conferencing tools can at times feel flat, repetitive, and stale. I often find myself pondering questions on how I can keep students actively engaged and maintain their interest. One potential solution lies in the growing number of virtual collaboration spaces like Mozilla Hubs, Gather Town, or Online Town and the possibilities they offer for connection, collaboration, and creativity.
What is Mozilla Hubs?
Virtual reality (VR) is an immersive, interactive experience generated by a computer. Mozilla Hubs melds the world of VR and social interaction in an online virtual social space. It’s a great way to bring learners together in a shared virtual space. You can create a virtual room and invite others to join you. Unlike video conferencing platforms like Zoom or Google Meet, Mozilla Hubs is an immersive experience (think along the lines of OpenSim, SecondLife, or Minecraft), so it opens up opportunities for exploration and creation that most video conferencing platforms do not offer.
Basic information
| Name of tool | Mozilla Hubs |
| URL | https://hubs.mozilla.com/ |
| Primary purpose of tool | Social collaboration |
| Cost | Free! |
| Ease of use | Relatively easy to use |
| Terms of service | Terms of service |
Overview of the Tool
While Hubs is VR-friendly, you don’t need a VR headset or device and can access it through your browser by visiting the Hubs website. It works on most browsers with Firefox or Chrome, providing the best functionality on desktops or laptops. Hubs can be used on mobile devices as well; if you are using it on an iOS mobile device, Safari is the recommended browser (note: Safari is only recommended if using Hubs on an iOS mobile device; if you are using Hubs on a Mac or Macbook, Chrome or Firefox are suggested). It is also usable on various VR headsets such as Oculus Quest, Oculus Go, HTC Vive, Pico Neo 2, Windows Mixed Reality, and even Google Cardboard.
Creating a room in Hubs is very easy. Once you log in to Mozilla Hubs, simply click on “Create a Room” and it will create a room for you. Once you have created the room, you can enter it by clicking on the blue “Join Room” button. The room you have created is private, and only people with the link will be able to enter it. Upon joining the room, it will prompt you to allow your mic (you must do this to enable voice chat). Clicking on the overflow menu (three dots), you can access more controls, such as changing your avatar, room settings, and preferences. Selecting “Preferences” will allow you to set controls for your room, like muting microphones upon entry or disabling teleportation. Teleportation is a feature in many video games, virtual worlds, and virtual collaboration spaces that allows users to instantly travel between locations or levels. Turning back to the controls, the microphone button will enable you to mute and unmute your microphone so that others in the room can hear you. You will be able to hear and interact with others who enter the room by moving your avatar closer to them. Alternatively you and your students can interact via the chat feature.
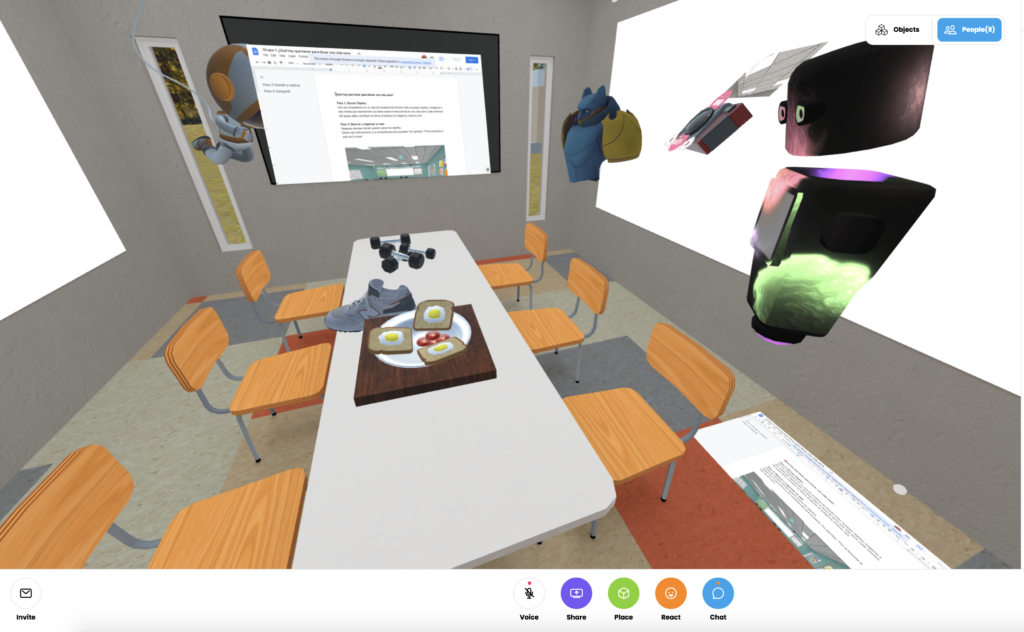
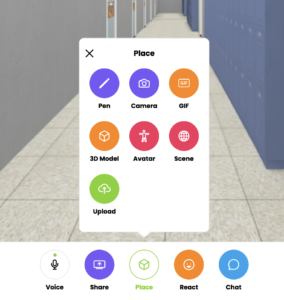
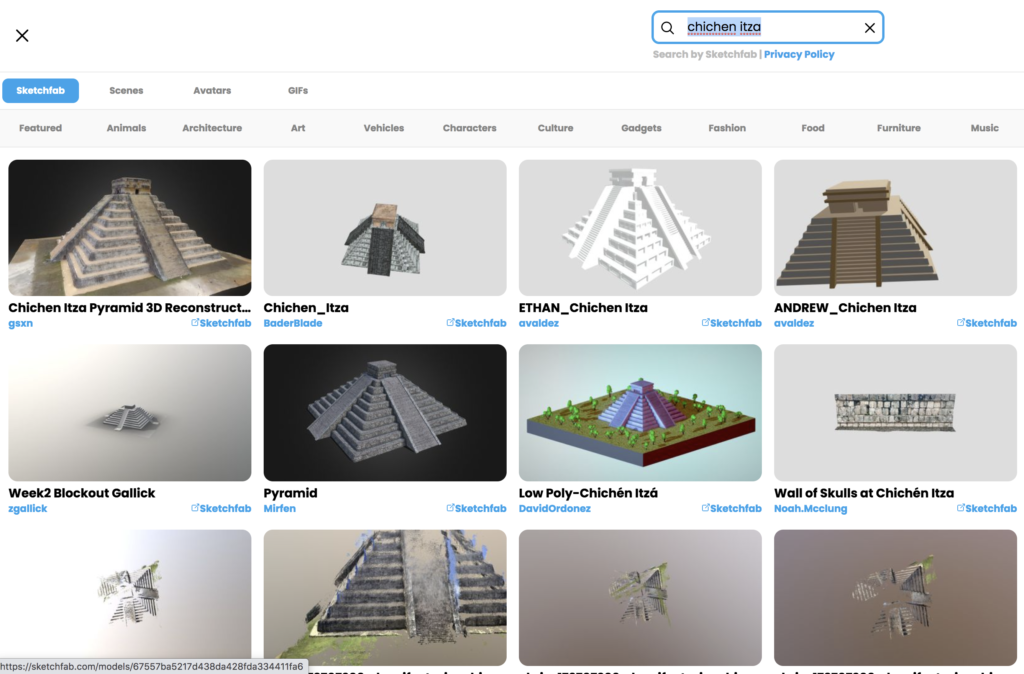
Taking a look at some of the other features, you will note that the purple screen share button allows you to share your screen in the room or even to turn on your camera and share the video from your webcam so students can see you talking to them in real time. This is a helpful feature for checking in on how students are doing, clarifying instructions, and troubleshooting. Clicking on the green “Place” cube allows you to place a variety of items in your virtual environment. The pen will allow you to write or draw where you point it, the camera lets you take a photo in the virtual room, while the GIF button allows you to choose from a variety of GIFs and place them where you desire. Likewise, the 3D models button enables you to search for 3D objects within Mozilla Hubs and place them in the room. There is a wide variety of 3D objects available such as animals, art, architecture, food, fashion, furniture, gadgets, to name a few. Hubs users can interact with 3D objects or use them for a variety of purposes like decorating or personalizing a space, connecting with or viewing art, architecture or objects from the target language culture, or even for games like a virtual scavenger hunt. Objects can be resized, rotated, moved or cloned as well. You can also set other avatars or scenes in the room with their respective buttons. Perhaps one of the most valuable features for teachers is the ability to share links via the green “upload” button. The upload button permits users to share content via URL like Google Docs or slides, YouTube videos, Kahoot games, and much more. Dragging objects moves them around the virtual space. If you want them to remain in the room even after you leave, hold down the spacebar as you click on the object and select “Pin”. This ensures that the object you place will be there even if you exit the room (this is helpful in preparing and setting up the virtual environment before your class). To delete an object from the room, just hold the spacebar, click on the object, and select the trash can icon.
|
|
|

As previously mentioned, invites can be done by sharing the URL. To invite students, simply click on the envelope icon. This will give you several sharing options: a URL, a numeric code, and an HTML embed code. The easiest way to share it with students is a URL; this can be copied and easily shared with students in various ways. An alternative is to select the embed code and embed it directly into your LMS. Lastly, if you or your students are accessing Hubs with a VR headset, it’s much easier to use the numeric code rather than the URL, as typing long URLs can be cumbersome with many headsets. In any case, sharing a Hubs room is quite simple and straightforward.
Some considerations
While relatively easy to use, there is a bit of a learning curve with Hubs. Like many video games or virtual worlds, Hubs uses the W,A,S,D letter keys on your computer keyboard for moving your avatar; alternatively, the arrow keys can also be used (note that on a mobile device, movement is done by using the on-screen joystick). The Q and E keys allow you to shift your perspective (moving your mouse on your computer or doing a single finger drag on a mobile device will also do this). If you are comfortable in gaming environments, Hubs is quite easy to get used to. However, if you are not a gamer or virtual world virtuoso, it may take more time, practice, and patience to become accustomed to. Regardless, I would strongly suggest practicing with a friend or family member before using it in class.
As far as language settings go, currently, the language for Hubs can be set to English, Spanish, Portuguese, Chinese, Japanese, Russian, or French. However, I have found that when searching for objects within Hubs, using English works better and provides more results than the other languages I tried (Spanish and Portuguese).
The maximum capacity for one room in Hubs is 25 users, so if you have a large class, this is a drawback. One possible workaround is to work in rotations, as Hubs will allow you to have additional spectators in the “Lobby”. The Lobby is where you will first land when entering Hubs. Users in the Lobby can see and hear what is going on in the room and interact via the text chat, however they are not represented by avatars and do not have microphones, thus they cannot interact with users via voice chat. So, if you had a large class, you could stagger it by having some students completing a task in Hubs while the classmates watch from the Lobby and then rotate.

Ways to Use Hubs
Hubs offers a host of possibilities for the online, blended, or hyflex language classroom. Virtual rooms can be used for synchronous class meetings, scavenger hunts, online language hangouts, creating virtual exhibits, or presentations; really, there are endless possibilities. In a hyflex or Here-or-There (HoT) context, Hubs may be a good way to offer a similar experience to all learners; in a sense, it could level the playing field a bit in that learners would all meet in the same virtual room regardless of their physical location. For the blended classroom, Hubs could be a place to get together online to work on projects as a virtual extension of the classroom. Next, I’ll briefly describe a lesson in Mozilla Hubs for an online language class.
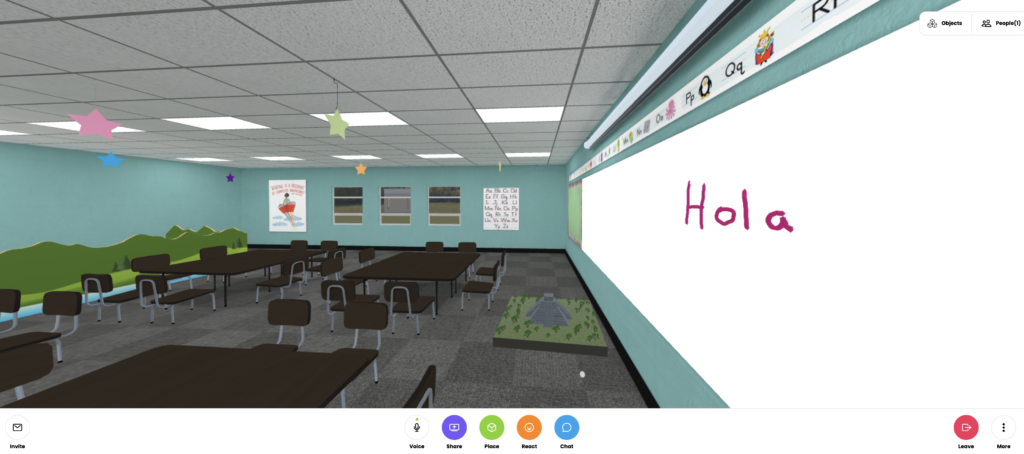
This lesson was done in an intermediate level college Spanish class as part of a larger unit focused on health and wellness. We began in our regular Zoom classroom and as I shared my screen, gave a short intro to Mozilla Hubs and went over the basic features and movements. I then shared the Hubs room link via the chat. The room I selected had several breakout rooms. (These breakout rooms are somewhat similar to breakout rooms in video conferencing platforms such as Zoom, although controls are more limited; for instance there is not the ability to assign students to a room or close a breakout room.) In these rooms they could work together on a task in small groups. Note, not all Hubs rooms will have breakout rooms, so it’s best to preview the rooms before selecting one to use in class. Prior to class, in each Hubs breakout room I uploaded Google Docs with the task instructions written on them. Their task was to think about the question, “What do you have to do to lead a healthy life?” and find 3D objects, GIFs, images, or other resources using the search feature in Hubs that represented this idea. They then had to decide how they wanted to arrange the objects in the space, giving each other instructions on where to move or place things. Then on the Google Doc, they had to write about how each object they chose related to the idea of healthy living and give some advice about how it could be used to maintain one’s health. Finally, I summoned the class back together, we visited the Hubs breakout rooms and each group presented their 3D objects, ideas, and advice.
While overall, it went pretty smoothly, there were some glitches. For example, one student experienced a lot of trouble moving their avatar, and another had some issues placing objects. In those cases, I instructed students to work with their partners, telling them the objects they wanted and where to place them. Since it may take students a little while to get used to the virtual environment, plan sufficient time for the task, as it may take longer than it would in a “typical” class. Furthermore, as you think of activities or tasks, try to think of ways you can take advantage of the affordances of the virtual environment (e.g. playful interaction, object manipulation, collaborative learning, creative thinking, content creation) and do things that you may not be able to do in a normal F2F or online classroom. At any rate, be mindful of the cognitive demands VR environments may pose and keep things simple to not overburden learners. For those who want more challenge and creative control, Spoke allows you to build custom scenes for Hubs. However, I won’t get into that now– that’s for another article!
These are just some of the ways you can use Mozilla Hubs to break up the monotony and spark collaboration. I’m certain you and your students can think of many additional creative ways to use it. In short, the possibilities are virtually endless!
This was very clear and helpful. I am exploring hunbs for some time, trying to get the idea, what they are, how to use them in class, and your post made things much easier for me.
Hi Marjan! That’s awesome. I’d love to hear more about how you are using it.