Using Readlang for Listening
By Shannon Donnally Quinn, Michigan State University

DOI: https://www.doi.org/10.69732/LJAO6340
Introduction
Recently, Anna Carson introduced readers of The FLTMAG to a wonderful tool called Readlang in her article “Supporting Semi-Autonomous Reading Has Never Been So Easy!”. After learning about the tool, I have discovered that it can also be used to practice listening. Anna mentioned this capability, but I thought it was worth a second look.
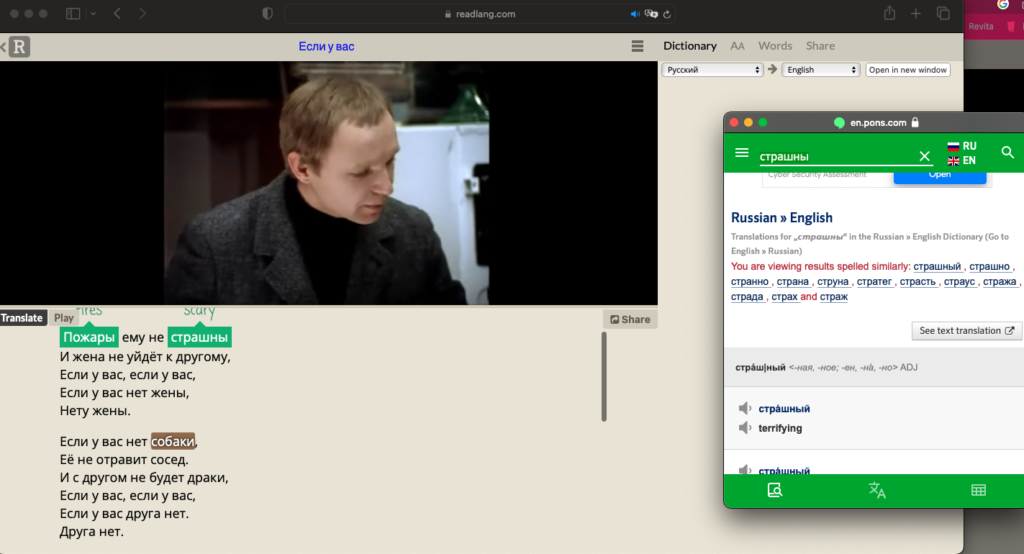
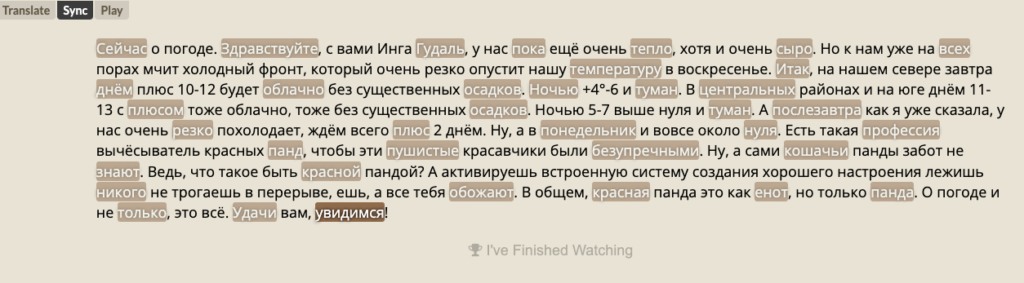
Readlang allows students to play a video with its transcript at the bottom of the page. As it plays, the brown highlighting moves from word to word, allowing them to follow along. If they do not understand words in the transcript, they can click on them to get a definition on demand (shown in green on the picture below). If they have an account, Readlang will save these words so that they can work on them as flashcards later. Students can also open a window that provides additional information on a word, including an audio clip of its pronunciation in isolation. Readlang has an already-established library of texts and videos that students can choose from that can be filtered by text type, proficiency level (based on the CEFR scale), popularity among Readlang users, and length.
Readlang also allows teachers or even students themselves to upload texts and videos as well and then either keep them private or share them with the Readlang community.
Benefits of Videos in Readlang
Students do not need accounts to use the videos, but students who have their own accounts can also upload videos and transcripts, giving them a way to independently work on their listening skills. Giving them the task of synching the transcript to the video is work that can help them improve their ability to parse words, and if they are able to eventually contribute their videos to the Readlang community, it can give them a sense of accomplishment.
Using Readlang can also help to alleviate some of the difficulties encountered in classrooms with mixed levels. Students who need more assistance can be given videos that have been prepared in advance, while students who are more independent can be working on their own videos, according to their own interests or to share with their classmates.
Of course, it is helpful if these tasks then lead to interactions between students. You could have two different students syncing different videos on the same topic and then discussing the differences between the videos. Since Readlang also includes reading texts, you could also have students recycle the vocabulary that they learned in a video clip through reading.
Steps for Uploading a Video to Readlang
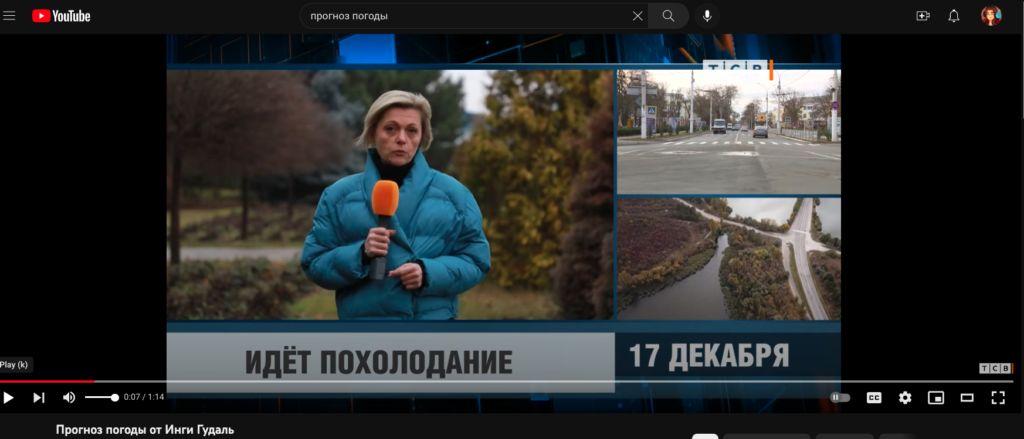
First, find a YouTube video that you want your students to watch.
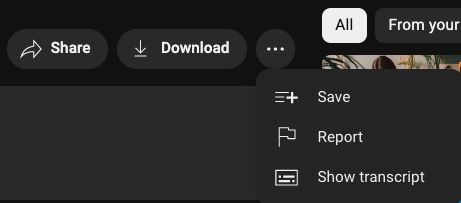
Then, click the three dots to the right of the “Download” button to obtain the transcript using the link “Show transcript”.
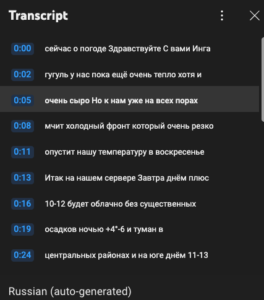
In some cases, the transcript that will come up will have already been corrected and edited, but in many cases, the transcript will be auto-generated, and will likely need to be corrected by you or by your students. The YouTube transcript also includes timestamps that will need to be removed from the transcript. These edits can either be done in a word processing application, or within Readlang itself.
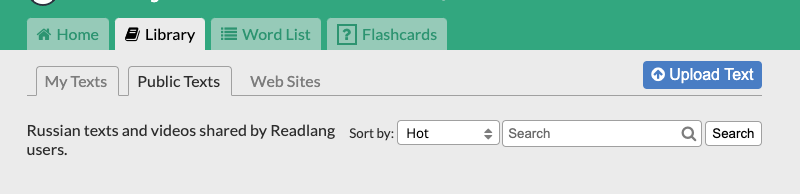
Next, inside your Readlang account, go to “Library” and click “Upload text”.
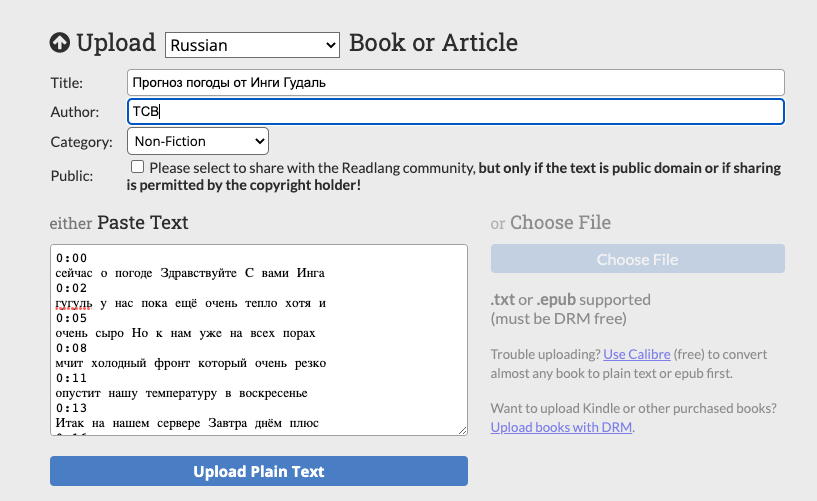
Here, Readlang will ask you for some information about what it calls a “Book or Article” (since Readlang was first intended for reading practice) – in this case it is actually a video. You can copy and paste the transcript from YouTube directly into Readlang, or you can work with the text first in a word processing application and then upload the file.
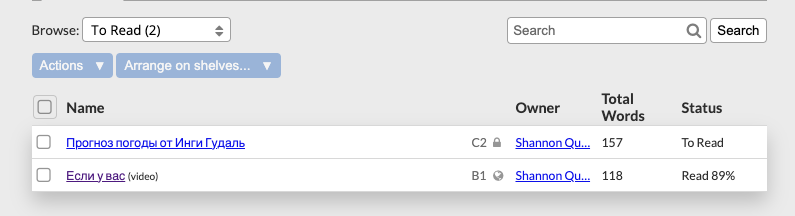
Then, once the text appears in your library, click on it to go to it.
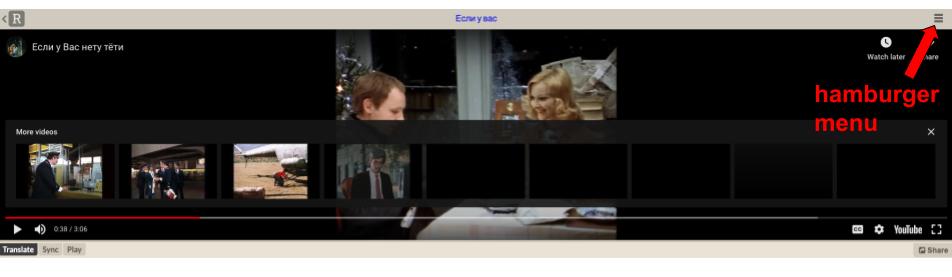
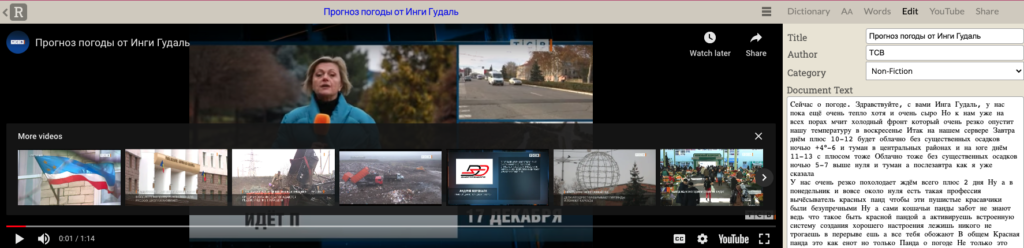
Once you have opened the text, navigate to the right side of the page and click the hamburger menu (indicated by the red arrow in Picture 8).
Then click on “YouTube”, and paste in the URL of the chosen YouTube video, which will then appear to the left.

If your transcript still needs editing, you can click on “Edit” on the right side of the page and continue to edit the transcript while watching the video.
Then you will need to sync the video to the transcript. Clicking “Sync” on the left side under the video allows you to do this easily. Play the video, and click on words as you hear them. You might have to do this more than once to get the timing right, but you don’t have to have 100% of the words synched for the timing to work reasonably well.
Once the transcript and video are coordinated, you can then use the “Play” mode to skip around in the video or the “Translate” mode to click on unknown words.
If the video is in the public domain or if you hold its copyright, you can share it with the Readlang community. Once you do this, use the given link to share it with your students, or choose to share it through social media.
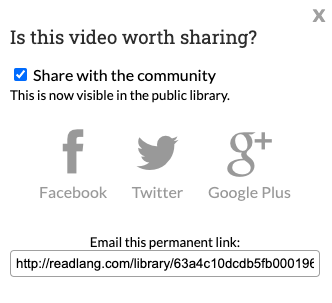
You can then share these links separately with your students, or if you have a premium account, you can create a “shelf” of texts and videos to share with your students.
Conclusion
Readlang is a tool that can be used to help students with reading and listening, giving them more independence and scaffolding the processes involved in interpreting authentic materials.