Storyboard That: Creating Digital Storyboards
By José Manuel Suárez, Teacher of French at IES Mata Jove High School (Gijón, Spain)
DOI: https://www.doi.org/10.69732/JSAN5802

Storyboard That is a web-based tool that allows students (and teachers as well!) to create digital storyboards. Its users are able to develop their creativity and writing skills while having fun designing the scenes or choosing the looks that better fit the characters that star in the story. This tool is optimal for digital storytelling: it is user-friendly, provides unlimited creative possibilities and, on top of that, there is a free option!
| Name | Storyboard That |
| Link | https://www.storyboardthat.com/ |
| Primary purpose | Creating digital storyboards |
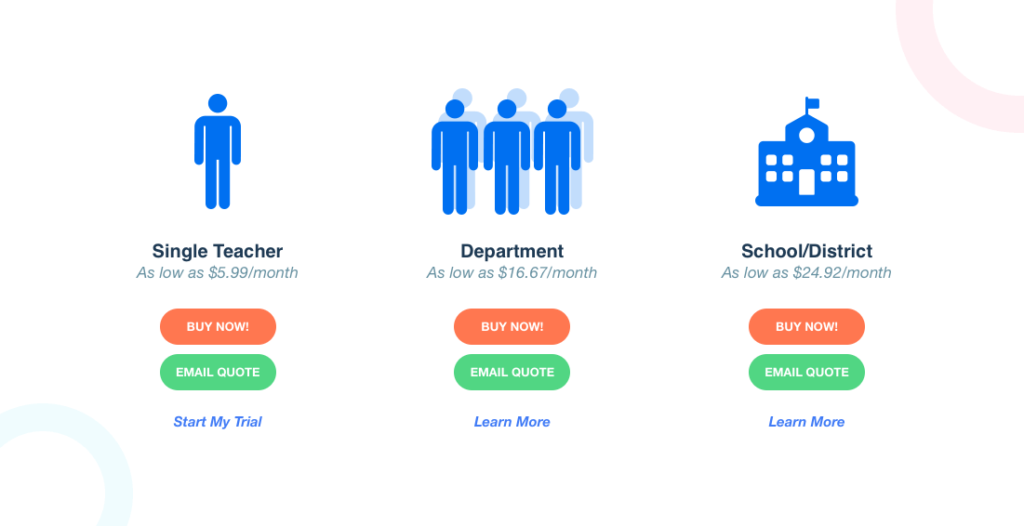
| Cost | Free option (limited) | Single teacher ($5.99/month) | Department ($16.67/month) | School/District ($24.92/month) | 14-day free trial |
| Ease of use | 5/5 | Easy to use, option to copy and edit elements between cells |
First Steps
Once you get into Storyboard That’s page, first you need to create an account. In order to sign up, choose a username and enter a valid email address and a password. Finally, you have to select a preferred pricing option: the basic one is free and there are three other options, starting from $5.99/month, that I will explain later on. After completing the registration process, you can already start creating storyboards!
While Using the Tool
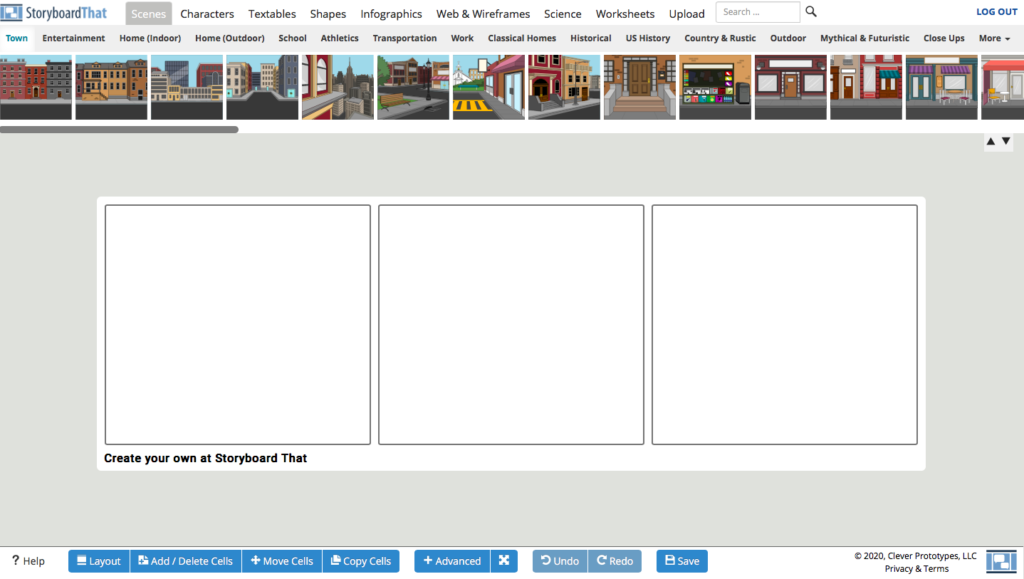
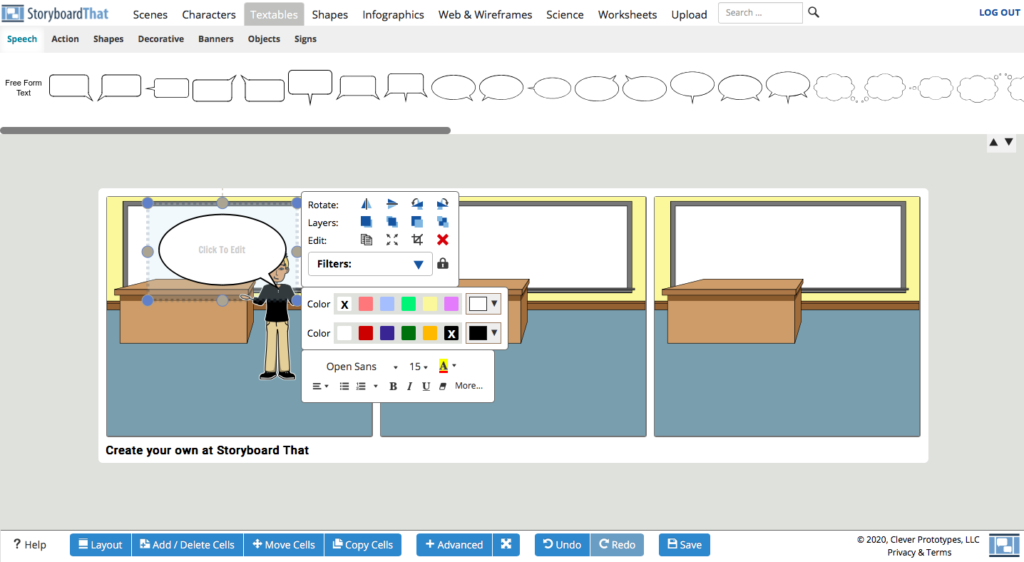
In the following picture you can see the blank board. As you can see, the control panel is in the upper part and includes eight different sections that you can work on: scenes, characters, textables (speech balloons), shapes, infographics, web & wireframes, science, and worksheets. However, for creating regular storyboards you just need the first three: scenes, characters, and speech balloons. Moreover, while using the free option there are three cells by default and you are allowed to work with a maximum of six.
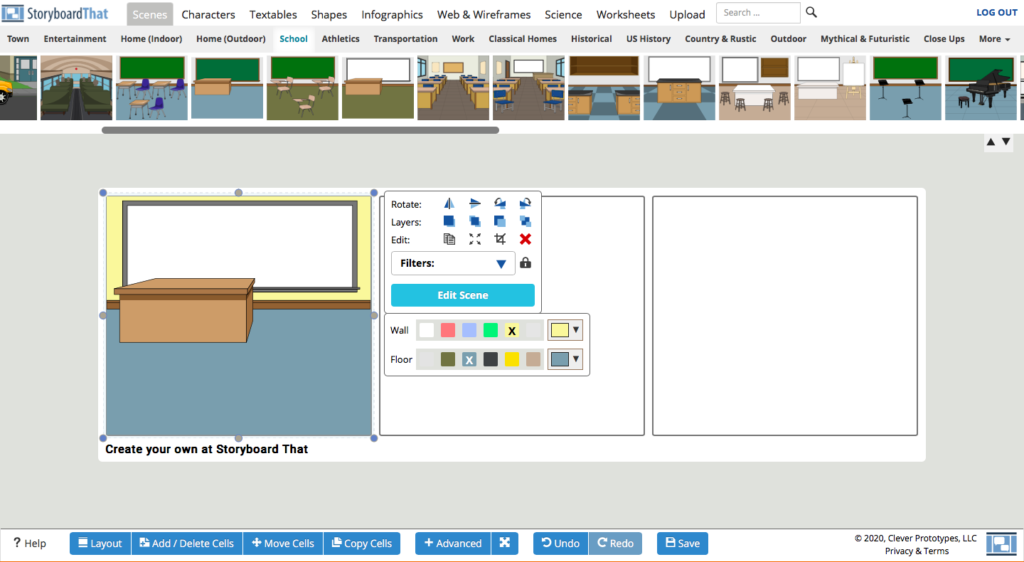
First of all, let’s choose a scene! There are many categories: town, home, school, work, outdoor… Why don’t we choose a classroom? We can edit the scene by default, rotate it or change the colors of the main elements. Once finished, the scene can be copied and pasted into further cells.
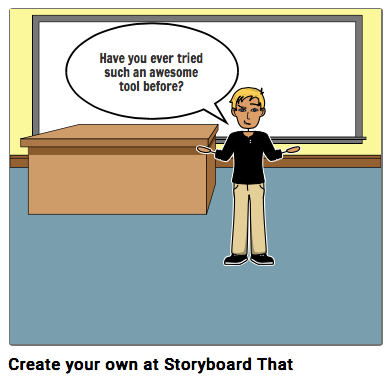
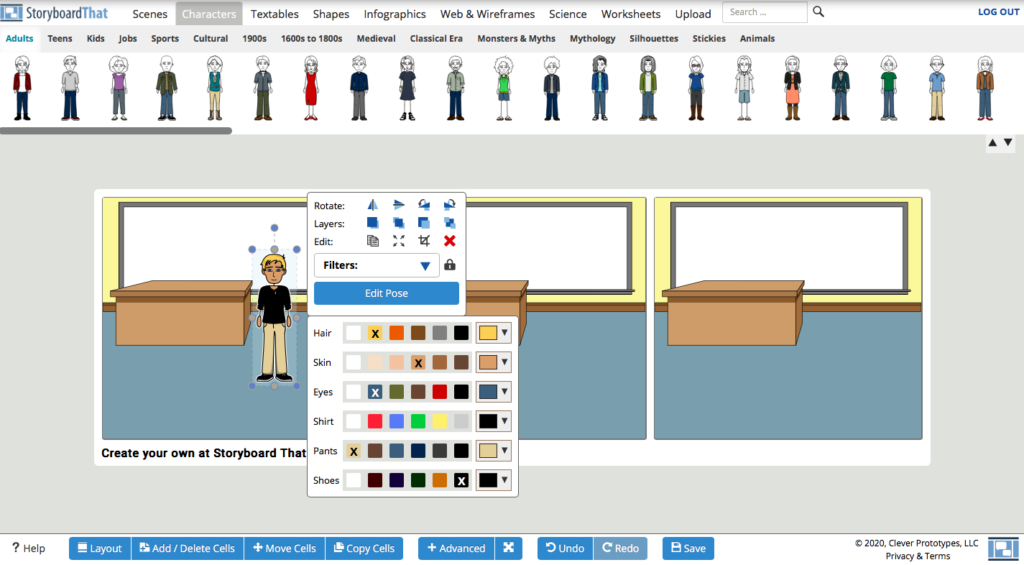
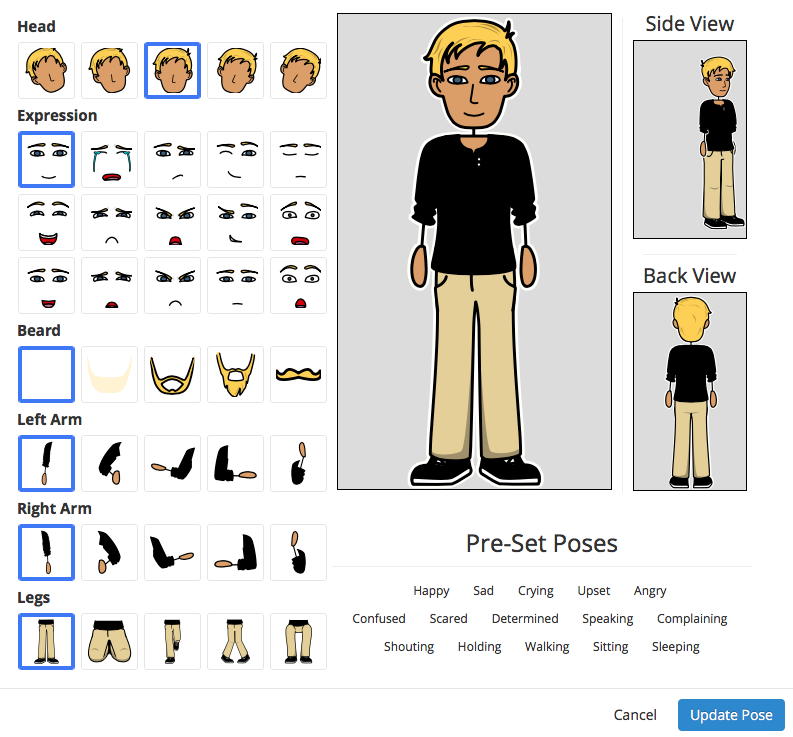
Now let’s create a character! In this case we can edit multiple things: the skin tone and the colors of the hair, eyes, and clothes. In addition, we can edit the pose of the character and its facial expressions, which allows us to have the same character but with different emotions. This is useful for creating stories, and indeed, students love that more than anything! Again, we can copy and paste the characters from one cell to another.
It is finally time to introduce the balloons and let our character speak! As you can see, there are multiple balloon shapes and we are allowed to edit the font and format as well.
Downloading the storyboard
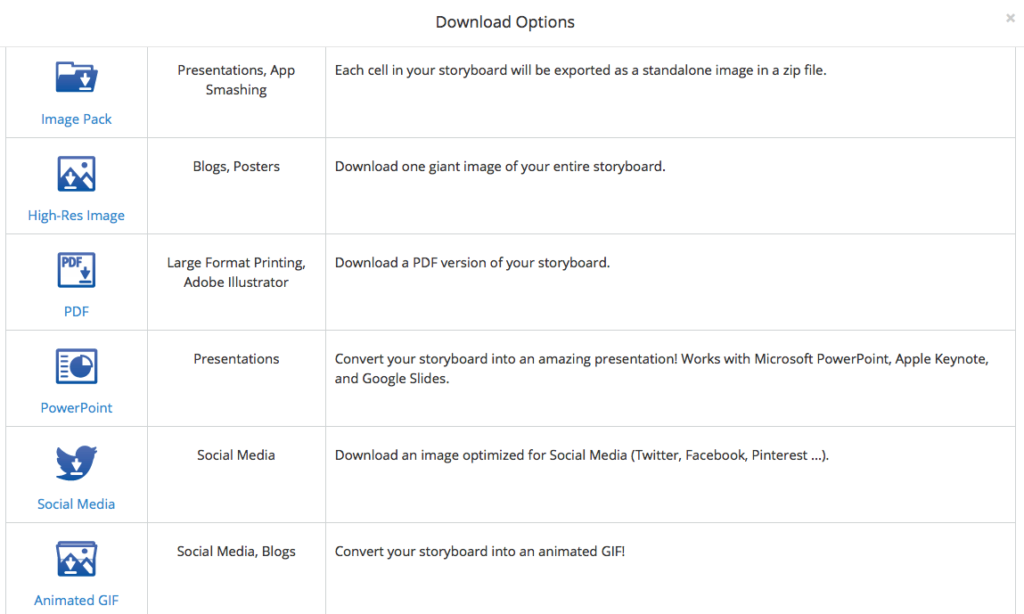
There are currently six different formats for download: Image Pack, High-Res Image (A3 size), PDF, PowerPoint, Social Media (an image optimized for Social Media) and Animated GIF. Unfortunately, when using the free option, our storyboard will be downloaded with watermarks on it. In order to avoid them, you could give the 14-day free trial a try.
Pricing options
As I mentioned earlier, there are four different pricing options available for Storyboard That’s users. My students and I are used to the free option and make the most of it, although there are some limitations: a maximum of six cells, up to two storyboards per week and basic print options. However, the company offers a 14-day free trial for licenses for teachers, departments, schools, and districts, and fees start from $5.99/month. In that case, the possibilities become unlimited: you can create as many storyboards as you want, up to 100 cells per storyboard, without watermarks, and with quick rubric and audio recording integration. It sounds very appealing!

How can you use it in the language classroom?
Storyboard That is a wonderful tool for the language classroom, as it combines language practice and skills development (what teachers look for) with fun (what students constantly demand). As you can imagine, this tool is ideal for task-based learning (TBL) or project-based learning (PBL). Furthermore, Storyboard That is suitable for cooperative and collaborative learning as well: two or even more students can work together on the same storyboard.
My favorite working option? Pair work: two students working with the same device and with the assignment of creating a communicative situation in six cells, generally about the topics that we have been practicing in class. In addition, students can present their own storyboards to the rest of the classroom and even play the dialogues they have written. Some students might discover their vocation as creative writers!
In sum, Storyboard That delivers and makes teachers’ lives simpler: creating cool digital storyboards and engaging students in learning and developing their writing skills while having fun at the same time. The only con is that the payment subscription may be a bit pricey, but as I have already shown, the free option offers plenty of possibilities!
José Manuel, this is great; thanks so much for sharing this tool! I can’t wait to try it. I have one question: do you feel like the characters offer diversity of skin tones/hair color, etc.? From what I can tell, it seems like they do, but I’d like to hear what your experience is with this. Thank you! ~Margot
Hi Margot. Of course, there are many skin tones/hair color variations available for the characters. From my experience, I recommend users to create a character once, then copy it and finally paste it into the following cells, so that it remains always the same. Don’t forget that you can change the pose as well! I hope you like the tool, José Manuel
Interesting tool! Thanks for sharing.
Thank you, Rocío!