
Configuring the iOS Screen Reader for Multilingual Support
By Justin Davis and Jonathan Perkins, Open Language Resource Center, University of Kansas


DOI: https://www.doi.org/10.69732/COFG5463
Introduction
If you are designing pedagogical materials or preparing to teach a new class, it is crucial that you have a basic understanding of screen readers to be sure that your materials are accessible to students who may have vision impairments. This is even more true if you are a language teacher, as multilingual support is an issue that is likely to be a new issue for students and accessibility support staff who are already quite familiar with screen readers.
A screen reader, as its name suggests, is an application used by someone with a visual impairment to access what is presented on the screen of a computer or a mobile device (i.e., a phone or tablet). It reads text aloud and allows the user to navigate through page headings, images, links, and other menus, provided things are set up correctly.
While there are many screen reading applications, some integrated into the operating system and others working as standalone software, we will focus here on the use of VoiceOver, found on the Apple iPhone and iPad. It comes pre-installed on iOS devices and its ease of use makes it a common choice among students with vision impairments.
Using VoiceOver with Other Languages
If you are setting up a new iOS device, you can activate VoiceOver in a few different ways:
- on an iPhone with Face ID, triple-click the side button
- on an iPhone or an iPad with a Home button, triple-click the Home button
- on an iPad without a Home button, triple-click the top button
If your iOS device has already been set up with VoiceOver, you can turn it on by asking Siri (“Hey Siri, turn on VoiceOver”) or by opening Settings, tapping Accessibility, then tapping VoiceOver and toggling the switch to the on position. You can always turn VoiceOver back off by triple-clicking or asking Siri (“Hey Siri, turn off VoiceOver”).
If you are new to screen readers, the first thing that you might want to do is to slow down the Speaking Rate. You will find that setting in the VoiceOver control panel just below the toggle on and off.
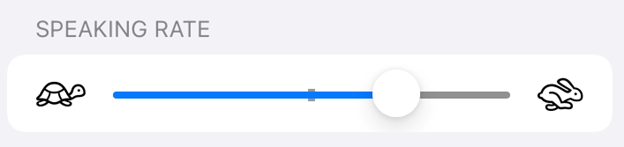
You might turn off VoiceOver to set this to a speed at which you are comfortable and then turn VoiceOver back on.
Once VoiceOver is enabled, the gestures used to control the device will change. Rather than clicking on something, you will move from one item to another by using one finger to flick left to right (forward) or right to left (backward) across the elements on the screen. As you do this, VoiceOver will speak the name of the highlighted item out loud. Try this out on the Home screen to move between apps. Once you hear the name of the app you want, tap twice anywhere on the screen with one finger to open that app.
After you have used the flick gesture to move around the screen and double tapped to open an app, you will probably want to get back to the home screen. You can do that by swiping with one finger from the bottom of the screen to about ¼ of the screen’s height. If you swipe up ½ the screen’s height you can open the app switcher.
Another important set of gestures for navigating can be found by accessing the rotor. The rotor can be used on any screen, although the actions that you can take with the rotor will depend upon the type of content you are accessing.

You will need to use two fingers to access the rotor as opposed to the one finger you used on all of the earlier gestures. There are two common options for how you place your fingers:
- hold your thumb and index finger in a “c” shape and rotate them clockwise and counterclockwise to move through the rotor options. You might think of it like trying to turn a dial that you are holding between your fingers.
- use your index and middle finger and move your index finger toward the top of the screen and your middle finger toward the bottom to move forward through the rotor options. Move your index finger toward the bottom and your middle finger toward the top to go backwards through the rotor options.
VoiceOver will play a sound and speak the newly selected rotor setting. Please note that the rotor will have more than one choice on it, so you may need to repeat the rotor navigation command to explore the full list of available options. The rotor is cyclical, so moving through the options will eventually return you back to where you started. When this happens, VoiceOver will speak the selected action and add the word “default.”
If you are new to the screen reader, you will probably want to set the rotor to Headings, which will allow you to move quickly through the major sections of the page by flicking your finger down or up. Once you get to the heading you want, you can flick right to move forward in the text and flick left to move backward in the text.
As you get comfortable, you might try the Words setting on the rotor to move through the text one word at a time, or the Characters setting to hear words spelled out. You can always add or remove items from the rotor using the Rotor menu inside of VoiceOver.
Using VoiceOver with Other Languages
If a web page or other document has been configured correctly, VoiceOver should automatically switch languages to match the text. For example, if VoiceOver encounters a sentence in English followed by a sentence in Spanish, it should read each language with the proper pronunciation. If you encounter a page in which VoiceOver uses the phonetics of one language (likely the default language of the device) to read another language, it is likely that the web page or document was not set up correctly.
There are two things in the Settings menu that you might try to address this issue:
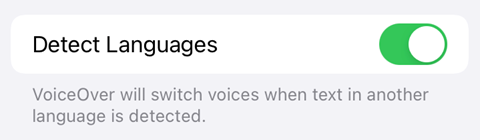
- make sure that the Detect Languages option in VoiceOver is toggled to the On position.
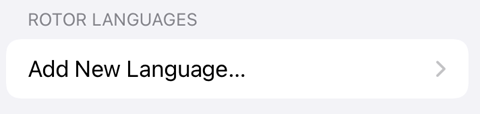
- add the language that you need in the Rotor Languages for VoiceOver
If neither of these solve the issue, your final option is to use the rotor to manually set the language for the text you are trying to navigate. Once you have selected the Language option in the rotor, swipe down to go through the language options available. This manual setting should work fairly well for documents in a single language, but if the text moves back and forth between the two languages you will need to change the language manually each time it changes in the text or listen to one language read consistently with the phonetics of another.
The default voices within VoiceOver are quite comprehensible but do tend to sound a bit mechanical. If you are planning to use VoiceOver with a language other than the default on your device, you should probably consider downloading a higher quality voice. You can add a higher quality voice using the Add New Language… option in the Speech section of the VoiceOver settings. Once that voice is shown in the Rotor Languages menu, click the right arrow next to that voice and you will get additional choices for that language, including male and female choices.
A Few Hints for Designing Accessible Multilingual Content
- If you create a Word document, make sure to code for language as you go. This can be done by switching keyboards on both Windows and Mac. These keyboards are completely free and sync up with the grammar and spell checkers to provide multilingual proofing. If you have already created the document, you can still set the language after the fact by highlighting the desired section and then setting the language using the toolbar near the bottom left of the Word window; you can also set it though the Language options under the Review tab.
- If you create a web page, you will need to declare the language in which the page is written and indicate those times when the language changes within the page. Keep in mind, however, that declaring the language on a web page sets the navigational terminology (heading levels, bulleted list, link, image, etc.) that the screen reader uses to the target language as well. For beginning-level materials, it might make sense to just leave the page encoded for English and then use <span> tags to mark those elements that are in the target language. Detailed examples are provided on the Internationalization section of the W3C website.
- Make sure to use the Headings styles in Word and the Heading levels in HTML rather than manually styling your headers. The screen reader needs these specific indications of headings to know where the major divisions of the page are located.
- Not all languages have voice synthesizers, so there are some documents and web pages that will likely be inaccessible until a synthesizer is produced. Here are lists of the most commonly used screen readers and the languages that they support.
-
- Jaws
- Text-to-Speech for Windows (used by NVDA as well)
- TalkBack for Android
- VoiceOver for Apple
Conclusion
Although it takes a bit of practice to get comfortable navigating a document or a web page using a screen reader like VoiceOver, it is not as hard as you might think, and it is incomparably easier than the new language that your students are trying to learn. Using a screen reader does, however, provide a real hands-on sense of which of your activities are inaccessible and which meet legal requirements but could be improved through broader application of universal design principles. In the case of language materials, you should be particularly careful that you are declaring the language being used. While online accessibility checkers may find no issue with your content from a structural standpoint, you are adding an unnecessary complication for those navigating your content with a screen reader. The smallest of changes is all that is required to make sure that all learners have equal access.