Building Virtual Worlds, Simple or Complex, in CoSpaces
 By Wenjing Huang, Chinese Teacher, George School, Newtown, PA.
DOI: https://www.doi.org/10.69732/ZYUF4244
Introduction
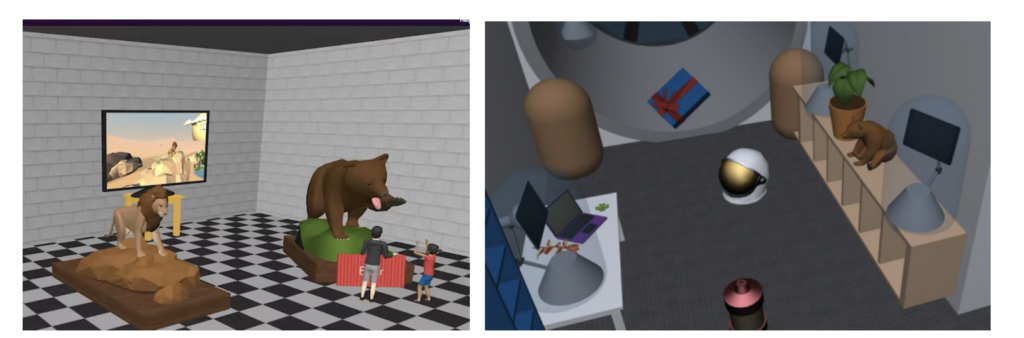
CoSpaces is a mixed reality (VR and AR) web-based application that allows users to create and engage with interactive media content. It allows students to demonstrate their knowledge in new ways by building virtual interactive worlds. Educators can use it to create a basic scene with a couple of objects and give students level-appropriate instructions on what to add or change in the target language. It is easy to set up groups so that students can co-create a scene, design their own story or simulation, and demonstrate their understanding of a concept.
| Name of the tool | CoSpacesEdu
|
| URL | https://cospaces.io/edu/
The CoSpaces Edu app is free to download. |
| Primary purpose of the tool |
|
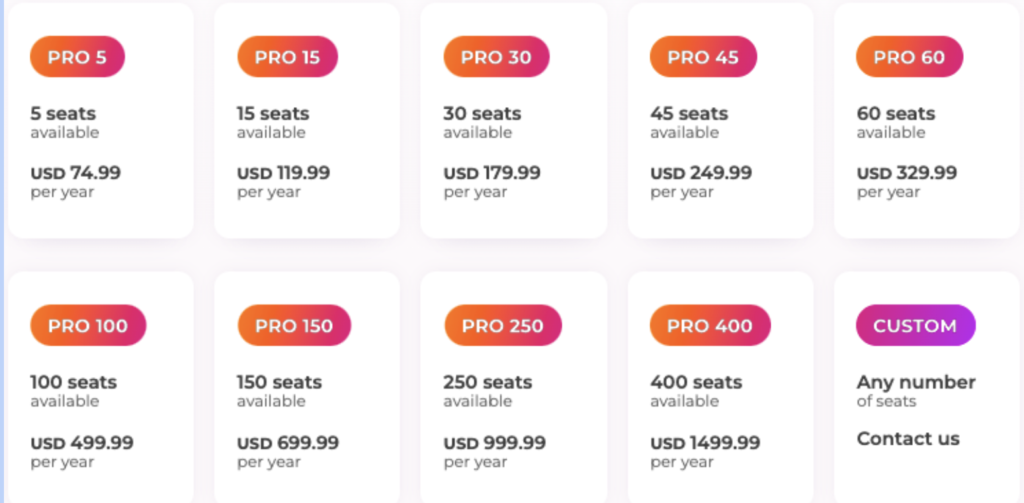
| Cost | Basic account: free
Pro: plan paid annually that has a certain number of seats (as below). Each user in a plan (either teacher or student) uses a seat. Seats can be reassigned to new users anytime.
|
| Ease of use | The CoSpaces Edu web app works in the most recent versions of Google Chrome or Mozilla Firefox on any computer.
The CoSpaces Edu mobile app runs on iOS 8 or Android 4.4 and higher. In order to experience CoSpaces scenes in VR and AR, the device must have a built-in gyroscope sensor. It is easy for users to sign in to create basic scenes. |
Overview of CoSpaces
-
Creating a CoSpace
Sign up for a Cospaces EDU account, then go to “CoSpaces”. This is where all of your creations are stored. You can start by exploring the “Welcome to CoSpace” section to get familiar with the basics. A CoSpace is a creation or project in Cospaces EDU.
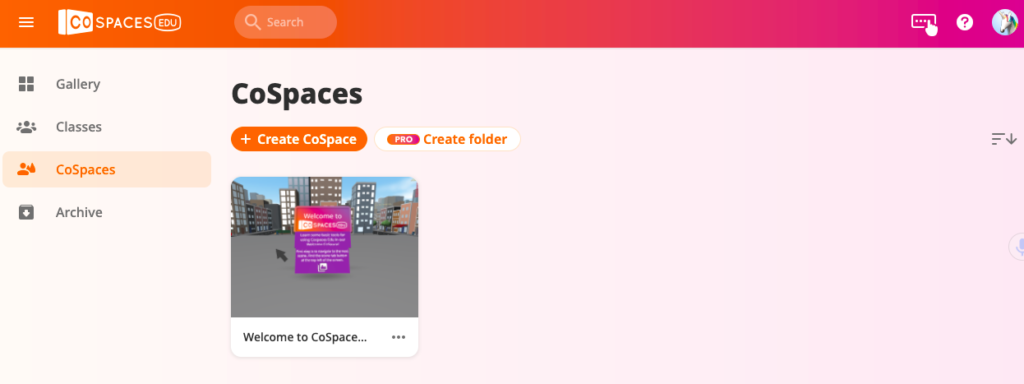
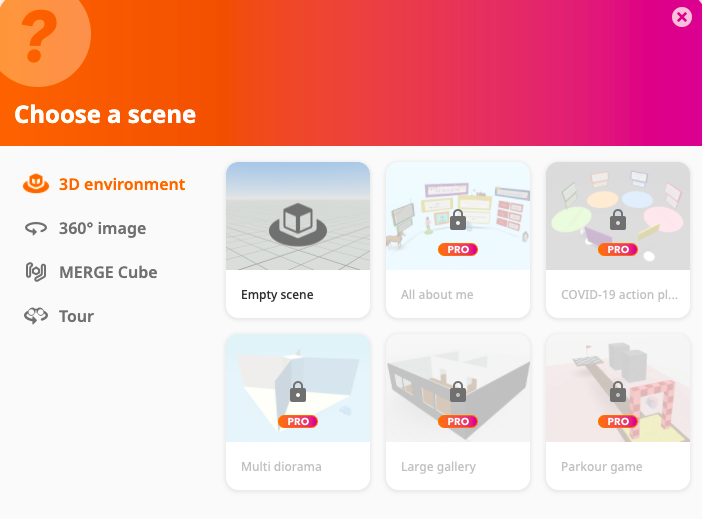
To start building, click “Create CoSpace”.The first step is to choose the first scene to build in. You will be able to add more elements later. The options are:
- 3D Environment: build in a 3D environment of your choice and view it in VR or AR later.
- 360-degree Image: build upon a 360-degree image of your choice and view it in VR.
- Merge Cube (Pro users only): build your own creations for the merge cube. Place content anywhere on, inside, and around a virtual cube to create your own hologram.
- Tour (Pro account only): create a virtual tour with your own 360-degree images.
With the free license, users can build environments and images from scratch. Pro users have access to various templates.
-
Setting up Your First Scene
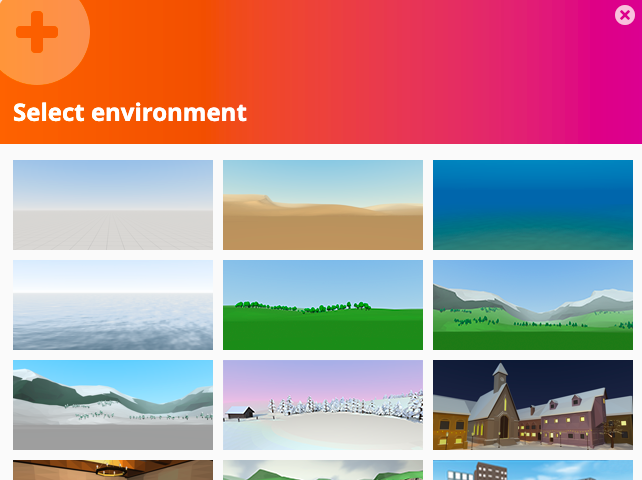
When you start with an empty scene in a 3D environment, you build from scratch on a large canvas with a grid. You can go to the bottom left “Environment” tab and pick one of the 3D environments available by clicking “Edit.”
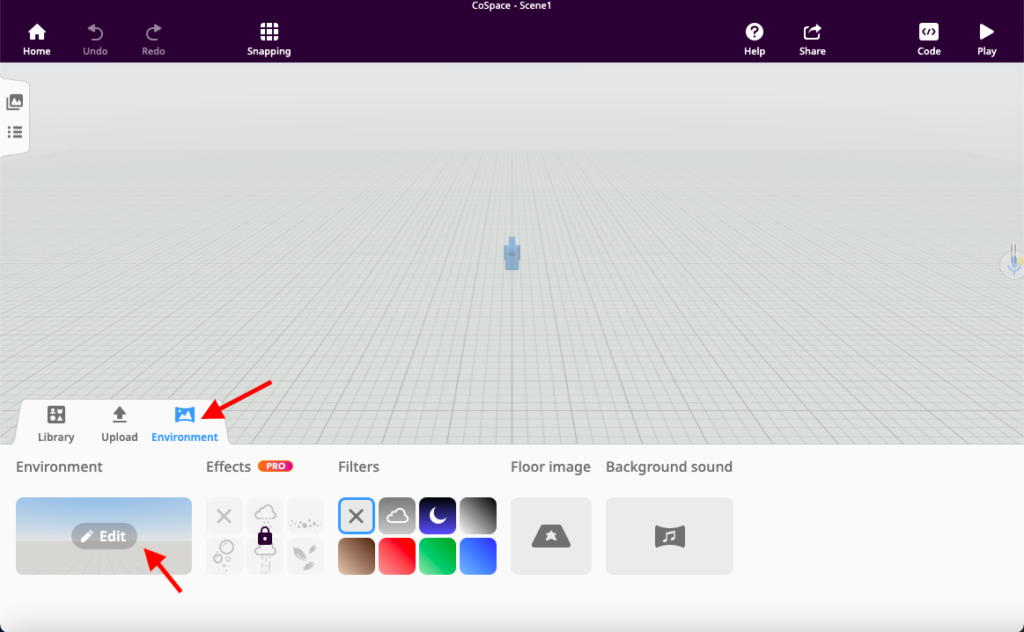
You will then be able to navigate your scene using your fingers, mouse, or keyboard, depending on your device.
-
Creating with 3D Objects
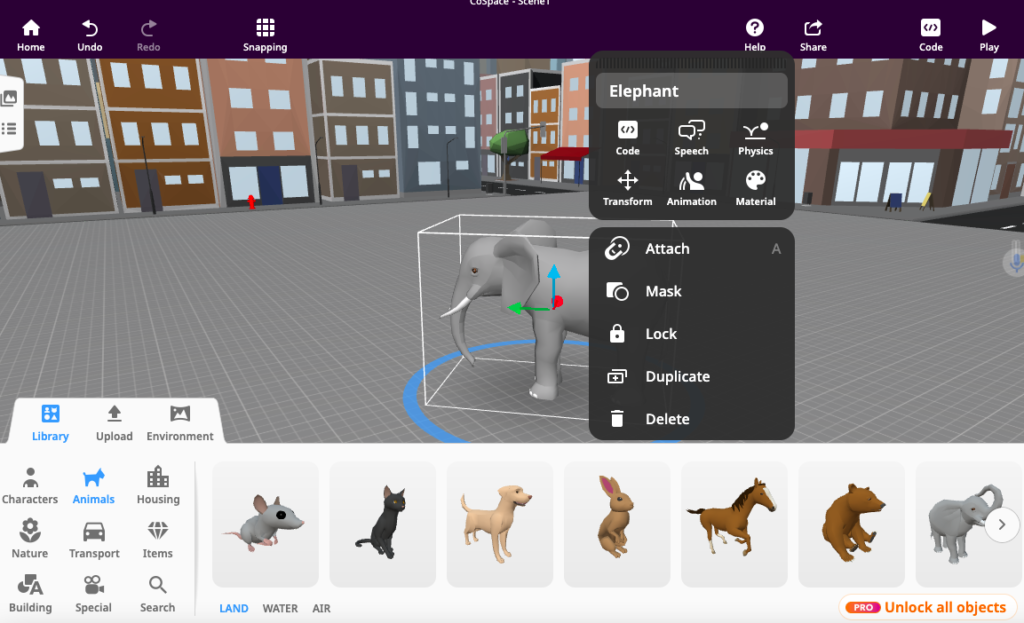
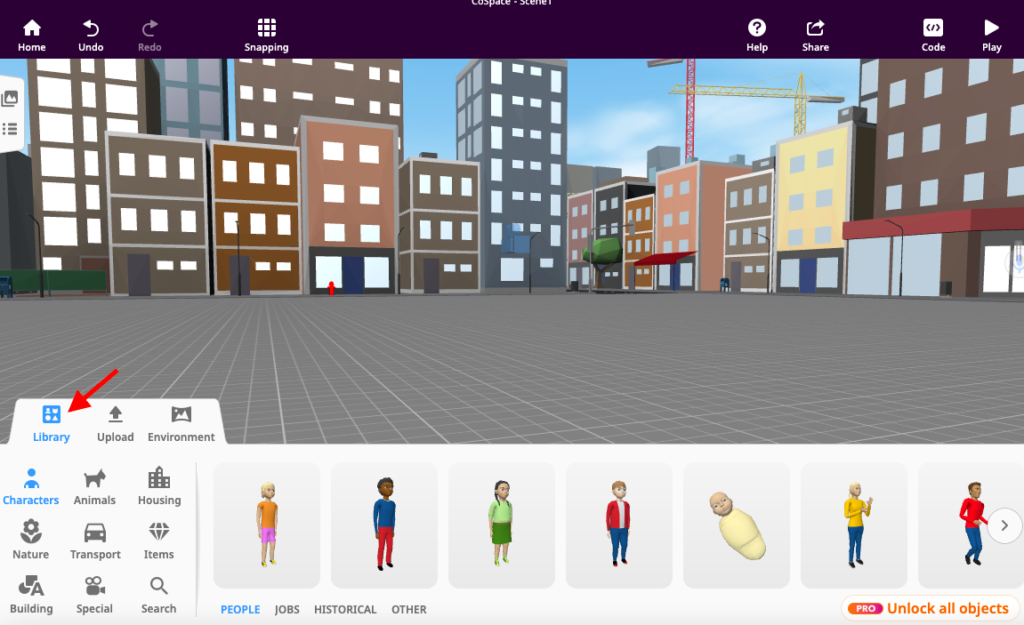
Open your CoSpace’s library to browse through the categories (Characters, Animals, Housing, Nature, Transport, Items, Building, Special). When you find a 3D object you wish to use, simply drag and drop it into your scene. Some objects are available as part of the free account. Others require a pro license.
Every object can be moved, rotated, and resized. Right-click or double-click the object for more options such as:
- Materials: change the color of the object.
- Animation: choose ready-to-use animations, including Neutral, Angry, Eat, Happy, Run, Sleep, and Walk.
- Speech: choose Think or Say mode, and add your text into the thought bubble. Cospaces supports Roman and non-Roman languages.
-
Creating with Building Blocks
You can use any building blocks available in the library to continue to create your scene. Blocks are primitive shapes that let you create anything you want in 3D. For example, you can:
- add, duplicate and delete blocks (with options to change their color, shape, and size)
- attach two building blocks together
- snapping: the objects in a CoSpace can snap to the grid. This feature makes it easier for the user to move and rotate them.
- add descriptions by using the text panel available in the building category
- add characters (with more options to customize their physical appearance and clothing)
-
Uploading External Files
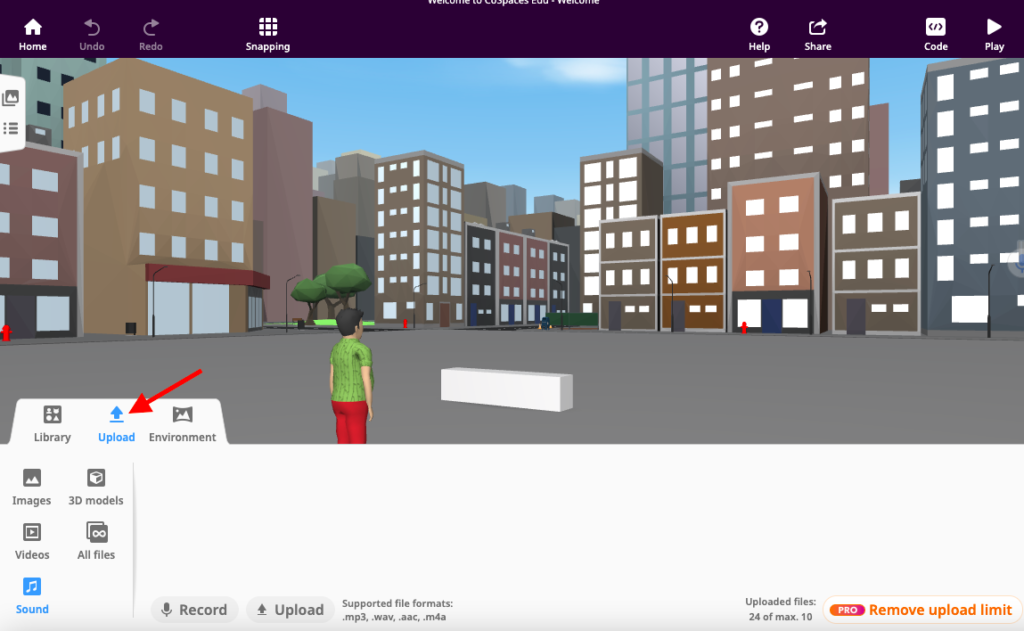
You can upload various external files to CoSpaces EDU such as:
- images (support .jpg, .png, .gif, .svg, .bmp formats)
- 3D models (support .obj, .mtl, .fbx, .zip formats)
- videos (support .mp4 file format)
- sound (support .mp3, .wav, .aac, .m4a file formats) including a feature to record a new sound file in your CoSpace
- or search for images on Bing
All the files you upload to your CoSpace can be found under “All Files”. Free users can upload up to ten external files in total.
In addition, Pro users can upload a picture to be placed onto the floor of an “environment” and use a sound file as background sound for their scene.
-
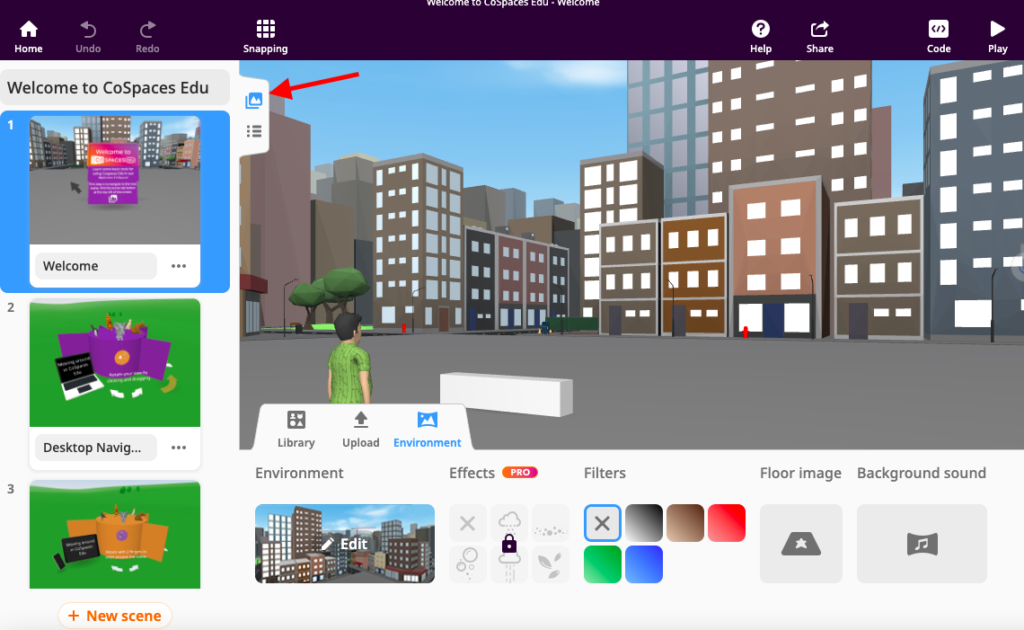
Creating More Scenes
Open the side menu on the left of your CoSpace. This menu lets you organize the scenes in your CoSpace. To create a new scene, you can duplicate an existing one or click “New Scene.”
-
Adding Code to Your CoSpace
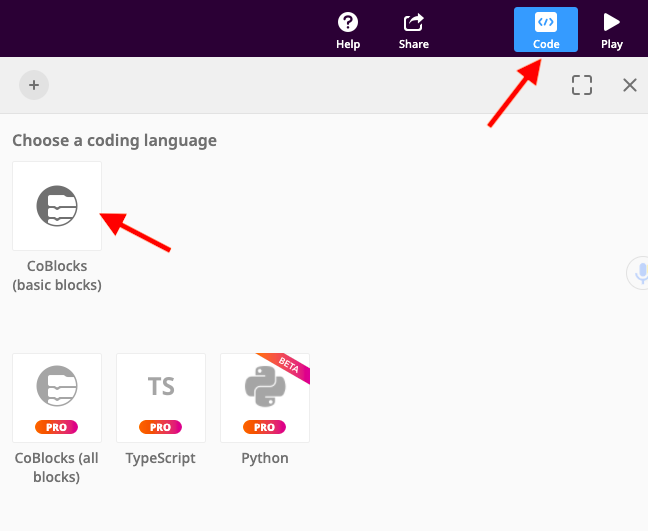
If designing and building your CoSpace is not all you want to do, you can also use “Code” (on the top right of the menu) to add motions and interactions. Novice users should start by using CoSpaces EDU’s visual coding language CoBlocks. Advanced coders can code with scripting languages (Pro feature only).
You can find the “Code” icon in the top-right of the menu, then click the “CoBlocks” icon.
You will then see the empty space on the right side, which is the CoBlocks workspace. The list of CoBlocks on the left side is the CoBlocks toolbox.
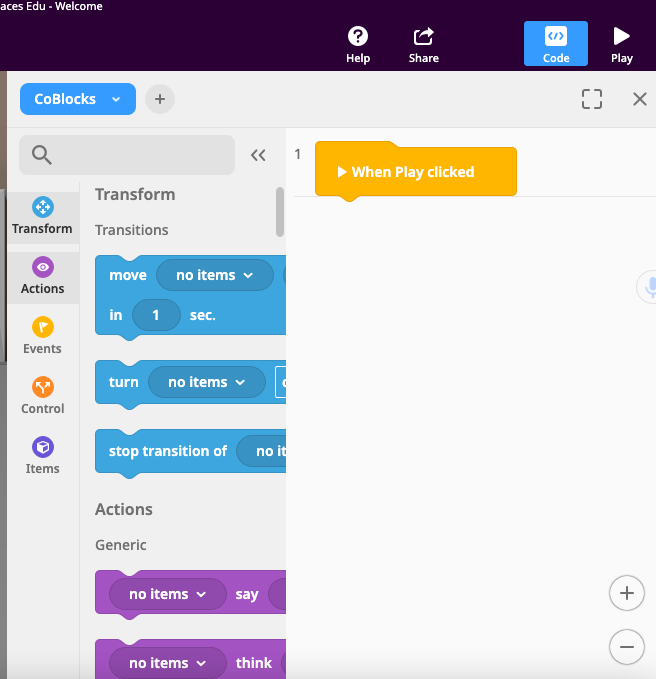
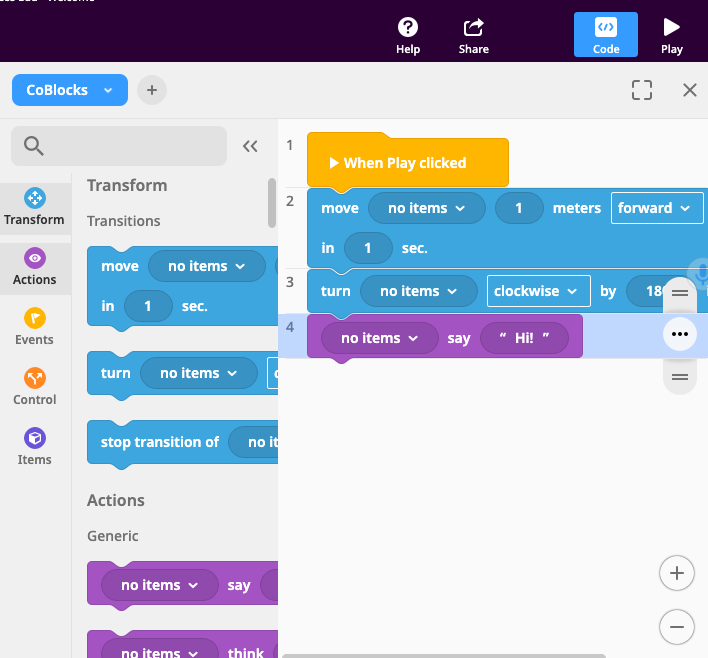
To code an object with CoBlocks, click “Code” and enable “Use in CoBlocks”. Then in the CoBlocks toolbox, drag and drop the CoBlocks you need from different categories, such as Transform, Actions, Events, Control, and Items, to “When Play clicked”. And as you can imagine, coding can go much further and deeper.

-
Sharing Your CoSpaces
CoSpacers can easily share their CoSpaces with others in different ways.
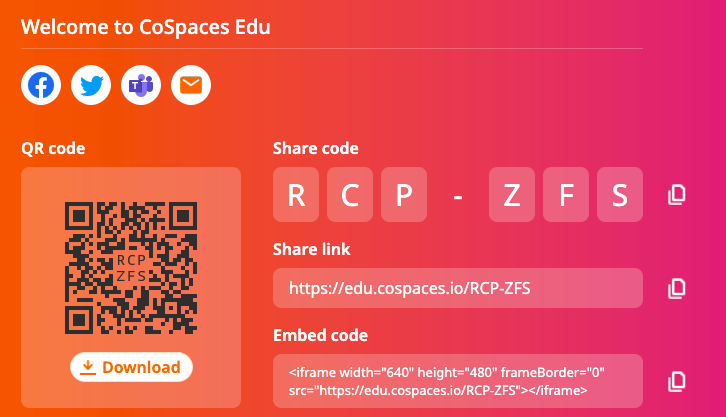
To share your CoSpace, open it and click “Share”. You will be given a QR code, share code, share link, and embed code. Pro users can “Publish” to the public CoSpaces Edu Gallery for other users to view.
Type in a name for your CoSpace and a description introducing it. After that, you will be presented with a simple share code and share link. Each shared CoSpace also has a unique QR code, which can be scanned with a smartphone or a tablet.
You can also easily share your CoSpace on social media or add your CoSpace to a website using the embed code.

-
Exploring CoSpaces
You can explore your creations or any other CoSpace shared in the CoSpaces Edu Gallery in many ways, including VR and AR.
CoSpaces can be experienced in VR with any mobile VR headset, such as plastic viewers and cardboard viewers. To explore in VR with a mobile device, open the CoSpaces Edu app on your smartphone, open a CoSpace and click “View in VR” at the bottom of your screen.
The Play Mode lets you easily explore a CoSpace and move around it on any device by opening a CoSpace and clicking Play (on the top-right of the menu). To move on a computer, use your mouse and the arrows on your keyboard and to move on a tablet, use the arrows.
CoSpaces Edu creations can also be projected onto the real world with AR. To explore in AR, open the CoSpaces Edu app on an AR-compatible device, open a CoSpace and click the “View in AR” icon to play. Scan your surroundings with your device to detect a surface to project your scene onto. Use a flat surface and avoid plain colors and shiny surfaces. Then tap to place your scene. You can then resize the scene or rotate it and move around it with your device.
-
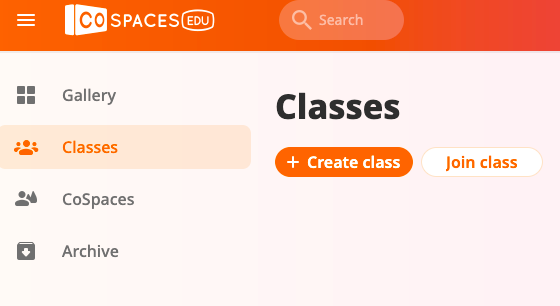
Pro Class Management
In addition to CoSpaces and Gallery, you can create and manage your “Classes”. With the free account, you can create 1 class, 1 assignment, and invite up to 29 students. Pro accounts allow for an unlimited number of classes and assignments. The number of students and teachers allowed depends on the number of seats included in your Pro account (both teachers and students use a seat, see image in table above for pricing and seat numbers).
After you create a class, a Class Code is automatically generated. Students will use this code to join your class. You can also add existing students who are already connected to your license plan to your class.
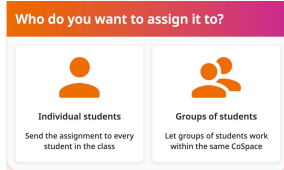
When creating an assignment, you can select the type of scene you would like students to create and enter a title and instructions. Then send the same individual assignment to every student in your class or send collaborative assignments to let groups of students work together within the same CoSpace.

In addition, you can send assignments based on existing CoSpaces that you have created or remixed from the Gallery. In Pro accounts, you can share your classes in CoSpaces Edu with other teachers by clicking “Add teachers” to your class.
Practical Uses for the Language Classroom
1. Virtual Seating Plan
This is a class activity to conduct at the beginning of the school year when students and the teacher don’t know each other.
Creating a virtual seating plan in CoSpaces Edu is much more interesting than in a face-to-face format, as it provides opportunities for students to introduce and represent themselves through animations and dialogues.
In this CoSpace, the objective is for students to use previous language knowledge to introduce each other. This works for any level of language classes. For example, at the novice level, students can use phrases and simple sentences, while at the intermediate level, they can use completed and connected sentences, which will give teachers a nice picture and general information about the whole class.
- The teacher uses a classroom template available in the CoSpaces Edu Gallery or creates a basic CoSpace of a classroom scene to get started.
- Change the location of the seats based on the classroom setting and assign desks and chairs to different students (characters in this CoSpace).
- Students receiving this CoSpace assignment change the appearance of these characters to match their own style in this classroom.
- They double or right-click the characters to add Speech bubbles and type their names in the target language and introduce themselves by typing and recording themselves.
- In addition, they are free to add animations and other items to decorate this virtual classroom.
2. Designing Your Ideal House
This can be used as an individual project for students to complete when learning the topic of the house and furniture. For an intermediate-level class, the objective is for students to use complete sentences to describe the house and the furniture they created in CoSpaces.
As a presentational task, students follow the instructions below to create their house and use text boxes to label their furniture, along with the recording feature to introduce the locations and details of each room.
Your House Project: create a CoSpace of a house scene and include the rooms below with furniture of your choice:
- At least two bedrooms
- At least one bathroom
- At least one living room
- One kitchen
- One garage
- Any additional spaces (such as balcony, study room, laundry room, garden, etc.) you want to add
- Label each of these rooms and their furniture in the target language
- Add text to describe the locations (such as A is on the second floor, B is on the left side of C) and colors of rooms and furniture
- Record yourself speaking to introduce what you like to do in these rooms, which room is your favorite, and why
As a follow-up activity to this project, students share their creation/CoSpace’s code with at least three classmates to let them explore their houses and write down what they see when they tour these three houses along with their additional comments (such as what they like or dislike in this house) in a Google doc.
Similar ideas can be applied to other individual or group projects in different levels of language classes to ask students to:
- Design a CoSpace scene of their school campus and use the target language to practice describing the school facilities, using direction vocabulary, and formulating sentences.
- Create a travel package with virtual tours in CoSpace 360° images and use multiple scenes with text to elaborate their packages by using travel-related vocabulary.
- Use their creativity to create any story in CoSpace, which can be a story students heard or read, and then create a visual representation based on their understanding. Or this could be a story they modified from a chapter of a book.
- Create a virtual card with a vivid, animated, and creative scene to share their best wishes to friends and exchange among students for special occasions such as Christmas or Thanksgiving to replace the traditional paper-form ones that are not environmentally friendly.
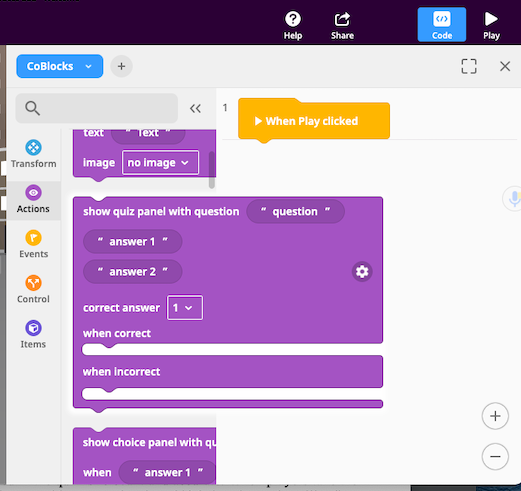
3. Quiz Game Creation
This activity requires using CoBlocks. The teacher can create the quiz, or, more interestingly, students can create the quiz either alone or in a group. Using CoSpaces and CoBlocks gives them some time to freely create a nice background scene related to their interactive quiz with 3D objects, images, videos, etc. They come up with questions and answers to design, then use CoBlocks code and the “quiz panel” available.
Students can be assigned to a language topic covered in class and create their quiz draft. The teacher then checks if the information provided in the quiz is relevant and accurate. When players take the quiz, teachers can also evaluate if they are able to complete it and whether their quiz results reflect a good understanding of the learning content.
Conclusion
CoSpaces EDU is an AR and VR creation app that enables you to create virtually anything: build immersive 360-degree tours, create interactive stories, design virtual exhibitions, program games with a visual coding language, or conduct an experiment in 3D. Creating with CoSpaces prepares students for college, their lives, or for their careers (including jobs that don’t yet exist). Students develop their creativity, digital literacy skills, critical thinking skills, collaboration and communication skills, coding, design thinking, and more. And the fun really begins when educators bring the engaging effects of VR and AR into the classroom, where students dive into their own creations in VR, project what they built onto the real world in AR, or even hold it in their hands with the merge cube.