Speaking Activities with H5P: Tutorial
 By Shannon Spasova, Assistant Professor of Russian and Technology Specialist in the Center for Language Teaching Advancement, Michigan State University.
The impending demise of the Flash player has been wreaking havoc with many apps that teachers use to create speaking assignments or oral tests for their students. While there are some solutions that don’t use Flash, and many apps are working on updating their code to HTML5, most of the low-cost options still rely on Flash. Enter H5P, an open-source, community-driven project that allows users to create and share HTML5 content.
H5P includes several activity types that can be combined together to create asynchronous speaking activities or oral tests for students. This process requires the ability to create html pages (such as a content page in a course management system for example) and knowing how to enter embed codes. In this article, I will walk you through the steps to do this.
Using H5P to create speaking activities has several advantages over other methods. Students do not have to create an account to use the H5P audio recorders. In addition, students can use their favorite way to create audio files (by using their phones, for example) if they prefer to do so.
To begin, you need a secure web page (has https at the beginning of its address – your course management system may provide this), and a free H5P account. I will use Google sites to demonstrate the process.
If you would like to first take a look at the finished product, visit my Google sites page.
Summary of the process:
Step 1: Plan your speaking activities
Step 2: Create an html page that will house your speaking activities
Step 3: Include text or images in your page
Step 4: Create audio prompts
Step 5: Find and include video prompts
Step 6: Provide the audio recorder that students will use to record themselves
Step 7: Give students instructions for how to get their files to you
Step 1: Plan your speaking activities
Before you get started within your web page, I recommend planning your speaking activities or assessment. Decide whether you want your prompts to be written or audio (or both), and whether you want to include images or videos that you want your learners to respond to.
Step 2: Create the html page that will house your speaking activities
First you should create the page in Google sites (or whatever platform that you are using) that will house your speaking activities. If you are using a course management system, the relevant action may be to “Create a page” or “Create a file”.
Step 3: Add text or images in your page
To add content in your page in Google sites, double-click on the page. You will get a choice of what to put in the page. Choose “Text” and begin typing to input a text prompt, or select “Images” to use an image.

Step 4: Create audio prompts
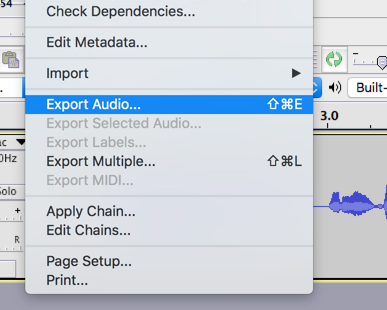
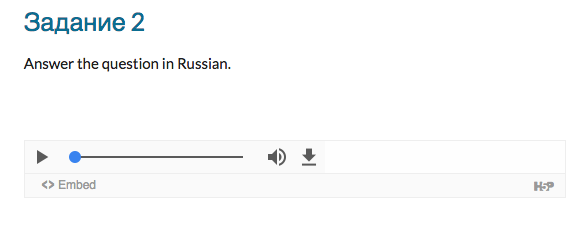
If you want to include audio as part of the prompts for your speaking activities, you will need to record it using an outside application such as Audacity (download it for free). Using Audacity, you can record yourself by simply clicking the red “Record” button. When you are finished recording, choose “Export audio” to save the file to your computer. H5P supports .mp3, .wav, .ogg, or a link to the audio file from somewhere on the web.
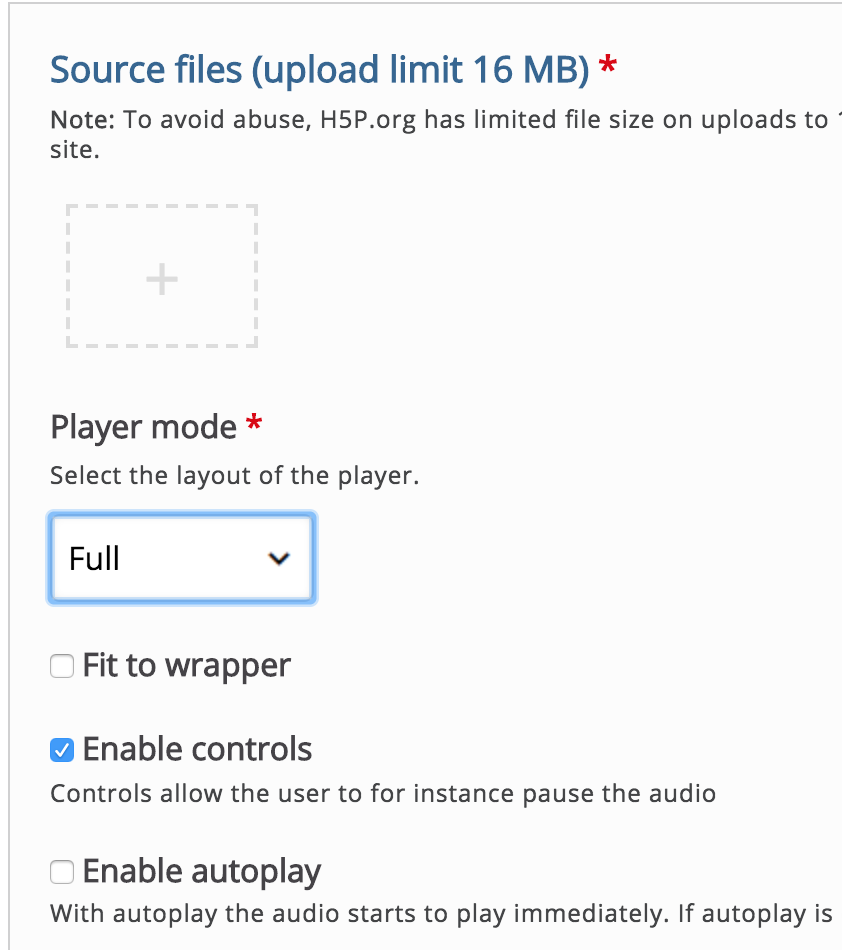
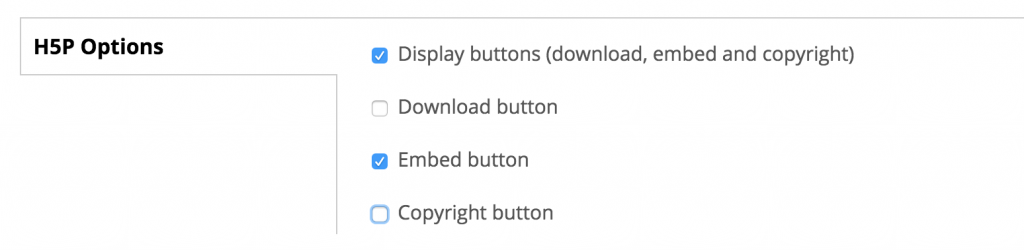
H5P allows you to easily include an audio player within your page (your course management system may also allow you to do this without using H5P). While in your H5P account, choose “Create new content”. Choose the activity type called “Audio.” H5P will prompt you to upload your audio file. I recommend choosing “Full” for the player, and disabling the “Download” and “Copyright” buttons at the bottom of the page (uncheck the box). If you want to include information about the copyright of the audio file, you can keep the Copyright button and enter relevant copyright information to be displayed to the users.
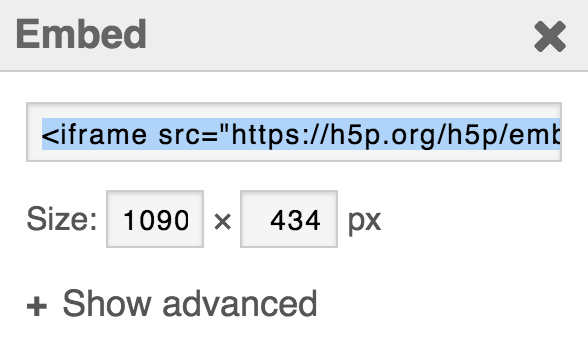
To add the audio to your Google sites page, you will need to use the embed code from H5P. To find it, go to the activity’s page on H5P and click on “Embed” at the bottom. A window comes up with the embed code already selected. Copy it with “Control-C” or “Command-C” and paste it into the proper place on your web page.
If you are using your course management system, you will need to know how to insert embed codes into a page. Sometimes it says “Source”, “Embed code”, “Custom HTML” or “Text editor, or may use a symbol that looks like this:

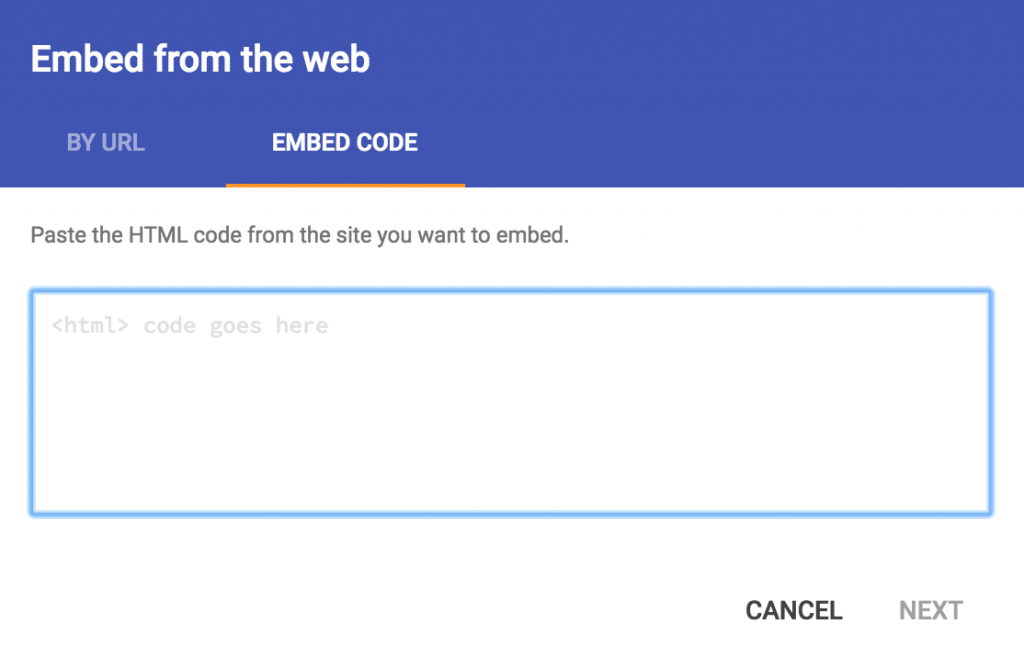
In Google sites, double-click on the page and then choose “Embed” and then “Embed code”. Paste the code that you got from H5P into the window, and then click “Next” and “Insert”.
Step 5: Find and include video prompts
You may want to use a video prompt instead of an audio prompts for your speaking activities. Most course management systems have a built-in way to add YouTube videos or videos that have been uploaded to Kaltura mediaspace. In Google sites, choose “Embed” and then paste the URL of a YouTube clip into the “By URL” window.
Step 6: Provide the audio recorder that students will use to record themselves
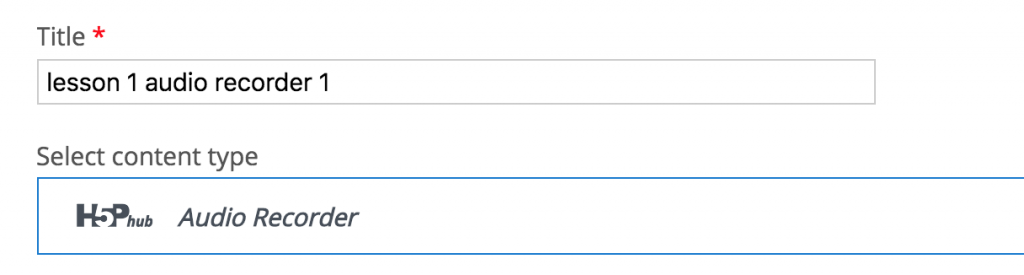
Now that you have learned to create your prompts (whether text, image, audio, video, or a combination of all of these), you need to incorporate the tool that students will use to record themselves directly within your web page. You will use “Audio Recorder” tool in H5P. Like you did with your audio files, you “Create New Content”, but now instead of “Audio”, choose “Audio Recorder.”
Again, I recommend unchecking the boxes next to “Download” and “Copyright” at the bottom of the page. This way, students won’t confuse these buttons with the ones that they will use to download their own recordings later. As you did with the audio files before, you should get the embed code from H5P, copy it, and then paste it into your web page.
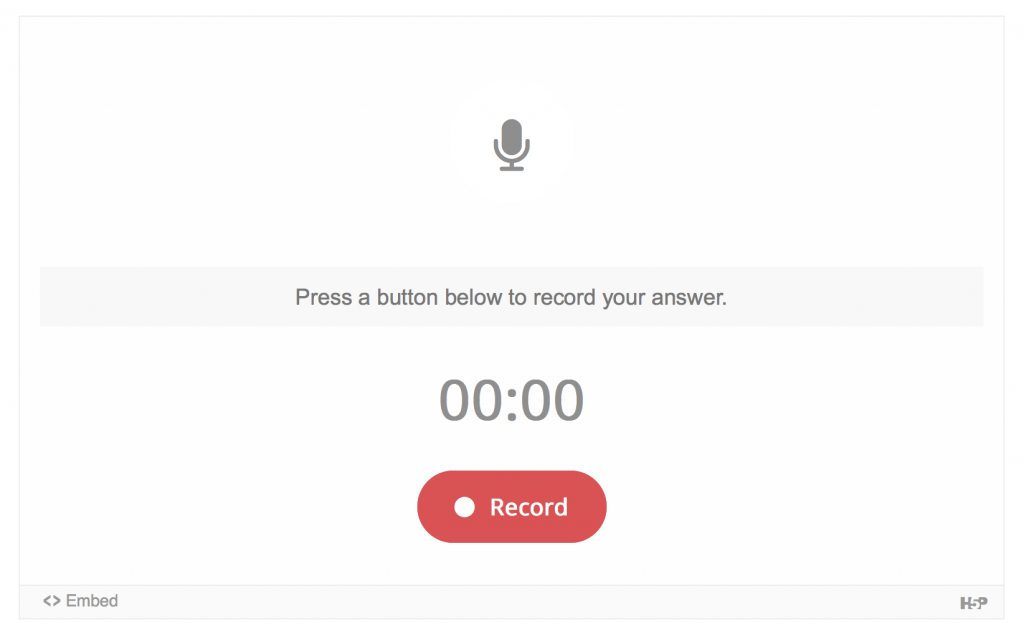
Once you save your page, you will be able to see what the students see. To record themselves, students will click the red “Record” button. Note that at this time, this recording method only works on some browsers (Edge, Chrome, and Firefox), make sure to share this information with your students.
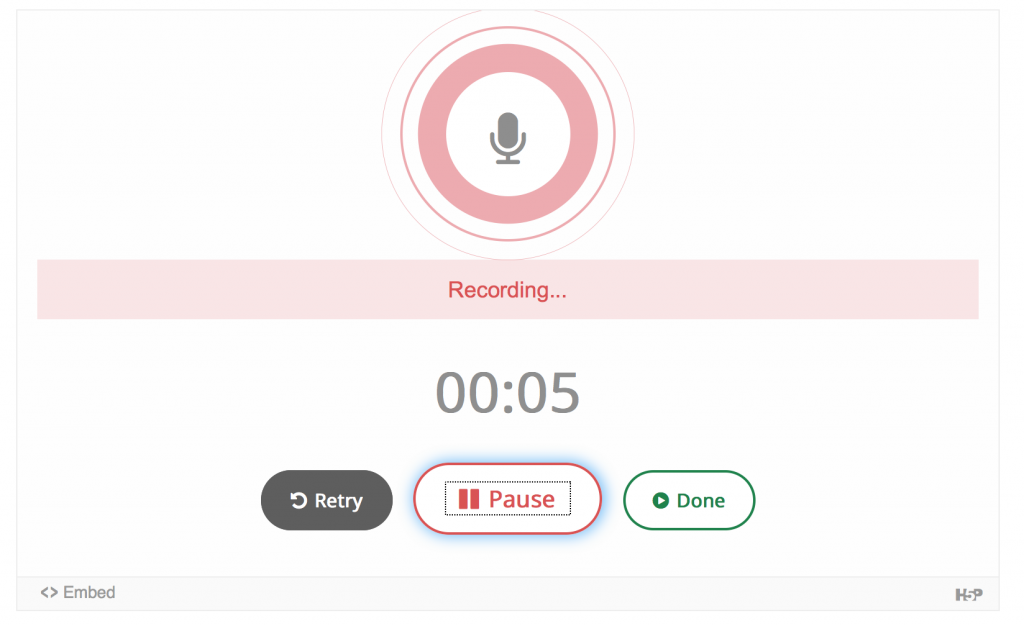
The page will display “Recording…” while the student’s voice is being recorded. Students can pause and restart during the recording. They click “Done” when they are finished speaking.
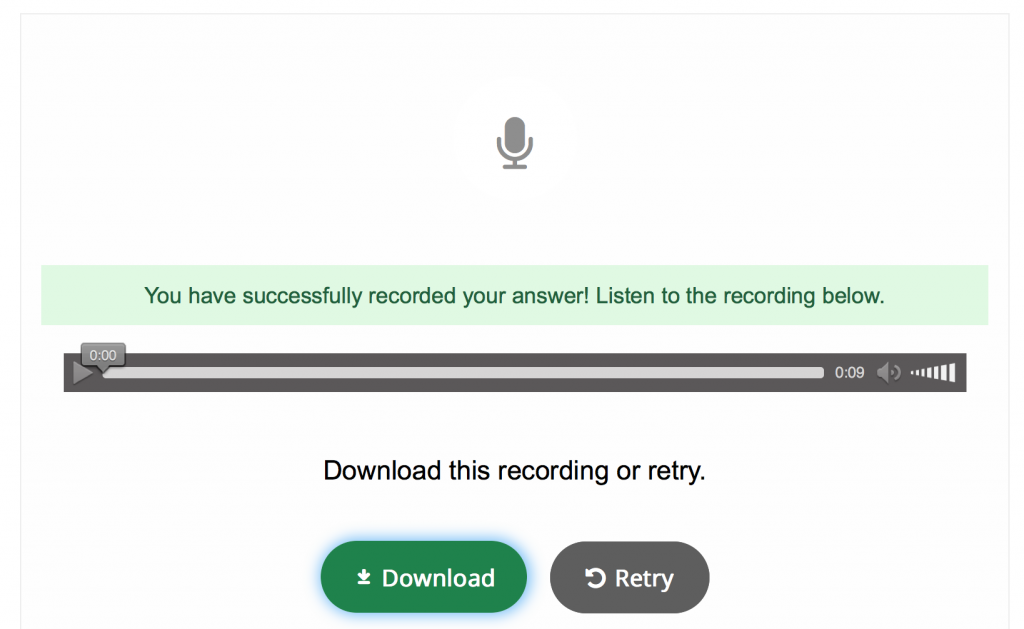
Students can listen to their recording and decide whether they are satisfied with it. If they are not, they can click “Retry.” Encourage students to record themselves multiples times as it is good practice. When they are satisfied, they should click “Download” and the file will be downloaded to their computer.
Step 7: Let students know how to get their files to you
You will need to give your students instructions in advance for what to do with the files once they are downloaded. I create a Dropbox within my course management system and have them upload them to the Dropbox. You may prefer that they send you the files by email or get them to you by some other method.
The method of creating speaking activities outlined in this tutorial might seem complicated at first, but in my opinion the advantages far outweigh the time spent. These speaking activities are flexible (can include many types of media), portable (can be used in any kind of secure web page that accepts embed codes), and user-friendly for students (students do not have to create a separate account and can use another method of recording themselves if they prefer). Further, H5P uses HTML5 rather than Flash, and for that reason these activities are likely to be usable much further into the future than most similar applications. Time invested now in the creation of these activities will translate into time saved in the future. I hope you decide to give it a try, and let me know how it goes!